Relevant push notifications are a great way to boost a user’s engagement towards an application. According to some analysis, push notifications increase app engagement by 88%. It’s also curious to see that the click-through rate for push notifications in Android (4.06%) is much higher than in iOS (1.7%).
In this tutorial, you are going to learn how to implement push notifications as an app feature using React Native and Firebase. We will be testing out the notification feature on an Android device, but you can go ahead and try it out on iOS yourself.
There are two main ways you can send push notifications to your app users: local and remote. Local notifications are sent from a React Native application, while remote push notifications are sent from the server or a push notification service such as Google’s Cloud Messaging Service (GCM). We will explore both approaches.
Requirements
To follow this tutorial, please make sure you have the following installed on your local development environment and have access to the services mentioned below:
- Nodejs (>=
10.x.x) with npm/yarn installed. - react-native-cli
- Windows/Linux users must be running an Android emulator or a real device via USB
- Active Firebase project
To know more about how to set up a development environment for React Native using react-native-cli, please refer to the official documentation.
You can find the complete code for this tutorial at this GitHub repository.
Install and Set Up react-native-push-notifications
The react-native-push-notifications library helps you set up controllers to consume local or remote notifications for iOS and Android devices. To begin, follow the instructions from the terminal window. Create a new React Native project and then install this library.
react-native int RNnotificationscd RNnotificationsyarn add react-native-push-notification
For iOS devices, this library depends on the manual installation instructions mentioned at PushNotificationIOS — an API that is maintained by react-native-community.
For Android devices, you are going to make the following edits in the appropriate files mentioned below. These modifications allow us to link native capabilities. First, open the file android/build.gradle and add the following:
buildscript {
    ext {
        // add the following two lines
        googlePlayServicesVersion = "16.1.0" // default: "+"
        firebaseVersion = "17.3.4" // default: "+"
    }
    repositories {
        google()
        jcenter()
    }
    dependencies {
        // add the following dependency
        classpath 'com.google.gms:google-services:4.3.2'
    }
}
Next, open android/settings.gradle and add the following before include ':app'.
include ':react-native-push-notification'
project(':react-native-push-notification').projectDir = file('../node_modules/react-native-push-notification/android')
In the above step, you are adding native bindings to allow the Firebase backend to send and receive notifications remotely. Do note that, if you are not looking forward to using remote notifications, you can ignore the above step. However, the following step is important for both types of notifications to work. Open the android/app/src/main/AndroidManifest.xml file. Before the <application> tag, add the following.
<uses-permission android:name="android.permission.WAKE_LOCK" />
    <permission
        android:name="${applicationId}.permission.C2D_MESSAGE"
        android:protectionLevel="signature" />
    <uses-permission android:name="${applicationId}.permission.C2D_MESSAGE" />
    <!-- < Only if you're using GCM or localNotificationSchedule() > --><uses-permission android:name="android.permission.VIBRATE" />
    <uses-permission android:name="android.permission.RECEIVE_BOOT_COMPLETED"/>
These settings allow the android app to have permissions like to vibrate when receiving a notification. Then, inside the <application> tag (and without deleting any existing tags) add:
<meta-data  android:name="com.dieam.reactnativepushnotification.notification_channel_name"
                android:value="YOUR NOTIFICATION CHANNEL NAME"/>
        <meta-data  android:name="com.dieam.reactnativepushnotification.notification_channel_description"
                    android:value="YOUR NOTIFICATION CHANNEL DESCRIPTION"/>
        <!-- Change the resource name to your App's accent color - or any other color you want -->
        <meta-data  android:name="com.dieam.reactnativepushnotification.notification_color"
                    android:resource="@android:color/white"/><!-- < Only if you're using GCM or localNotificationSchedule() > -->
        <receiver
            android:name="com.google.android.gms.gcm.GcmReceiver"
            android:exported="true"
            android:permission="com.google.android.c2dm.permission.SEND" >
            <intent-filter>
                <action android:name="com.google.android.c2dm.intent.RECEIVE" />
                <category android:name="${applicationId}" />
            </intent-filter>
        </receiver>
        <!-- < Only if you're using GCM or localNotificationSchedule() > --><receiver android:name="com.dieam.reactnativepushnotification.modules.RNPushNotificationPublisher" />
        <receiver android:name="com.dieam.reactnativepushnotification.modules.RNPushNotificationBootEventReceiver">
            <intent-filter>
                <action android:name="android.intent.action.BOOT_COMPLETED" />
            </intent-filter>
        </receiver>
        <service android:name="com.dieam.reactnativepushnotification.modules.RNPushNotificationRegistrationService"/><!-- < Only if you're using GCM or localNotificationSchedule() > -->
        <service
            android:name="com.dieam.reactnativepushnotification.modules.RNPushNotificationListenerServiceGcm"
            android:exported="false" >
            <intent-filter>
                <action android:name="com.google.android.c2dm.intent.RECEIVE" />
            </intent-filter>
        </service>
        <!-- </ Only if you're using GCM or localNotificationSchedule() > --><!-- < Else > -->
        <service
            android:name="com.dieam.reactnativepushnotification.modules.RNPushNotificationListenerService"
            android:exported="false" >
            <intent-filter>
                <action android:name="com.google.firebase.MESSAGING_EVENT" />
            </intent-filter>
        </service>
Lastly, go to android/app/src/res/values/colors.xml. If the file does not exist, create it. This file determines the color of the notification on an Android device. For example, the notification can be white:
<resources>
 <color name=”white”>#FFF</color>
</resources>
Note: To use this library with Expo, you have to eject the Expo SDK app.
Configure Local Push Notifications
In this section, you are going to write a configure function such that, when a button is pressed, a local notification is triggered. Create a new file src/services/LocalPushController.js. Start by importing PushNotification from the library you initialized in the previous step.
import PushNotification from 'react-native-push-notification'
Add PushNotification.configure() to the file. This accepts an object with a required method onNotification. This method handles what happens after the notification is opened or received. Since it is a required method, it has to be invoked whether the notification is local or remote. The demo application only invokes a console statement stating the properties of the local notification object used in the current demo app.
PushNotification.configure({
  // (required) Called when a remote or local notification is opened or received
  onNotification: function(notification) {
    console.log('LOCAL NOTIFICATION ==>', notification)
  },popInitialNotification: true,
  requestPermissions: true
})
Next, export LocalNotification in the snippet below – which gets invoked when a button pressed by the user or as the value of the onPress attribute.
export const LocalNotification = () => {
  PushNotification.localNotification({
    autoCancel: true,
    bigText:
      'This is local notification demo in React Native app. Only shown, when expanded.',
    subText: 'Local Notification Demo',
    title: 'Local Notification Title',
    message: 'Expand me to see more',
    vibrate: true,
    vibration: 300,
    playSound: true,
    soundName: 'default',
    actions: '["Yes", "No"]'
  })
}
PushNotification.localNotification has plenty of properties for each mobile platform (such as iOS or Android). From the above snippet, properties like vibrate, vibration, bigText, subText are Android only. However, properties like actions, title, message, playSound & soundName are cross-platform.
Import this method in the App.js file. Import LocalNotification from the src/services/LocalPushController.js file. Then, inside the functional App component, add a handler method handleButtonPress to invoke only when the user presses the button.
import React from 'react'
import { Text, View, Button, StyleSheet } from 'react-native'
import { LocalNotification } from './src/services/LocalPushController'const App = () => {
  const handleButtonPress = () => {
    LocalNotification()
  }return (
    <View style={styles.container}>
      <Text>Press a button to trigger the notification</Text>
      <View style={{ marginTop: 20 }}>
        <Button title={'Local Push Notification'} onPress={handleButtonPress} />
      </View>
    </View>
  )
}const styles = StyleSheet.create({
  container: {
    flex: 1,
    justifyContent: 'center',
    alignItems: 'center'
  },
  buttonContainer: {
    marginTop: 20
  }
})export default App
Now, from a terminal window, run react-native run-android. Make sure you have a device connected via USB and have USB debugging enabled, or you can test on an Android Emulator.
The output of the above code snippet should look like this:
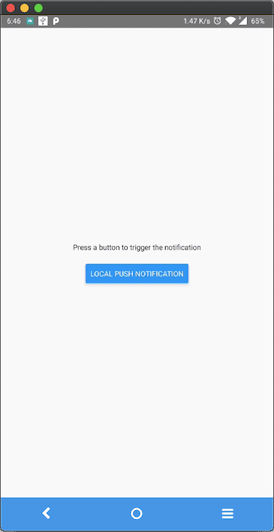
When the button is pressed, it displays the notification, vibrates the device, and plays a default notification sound.
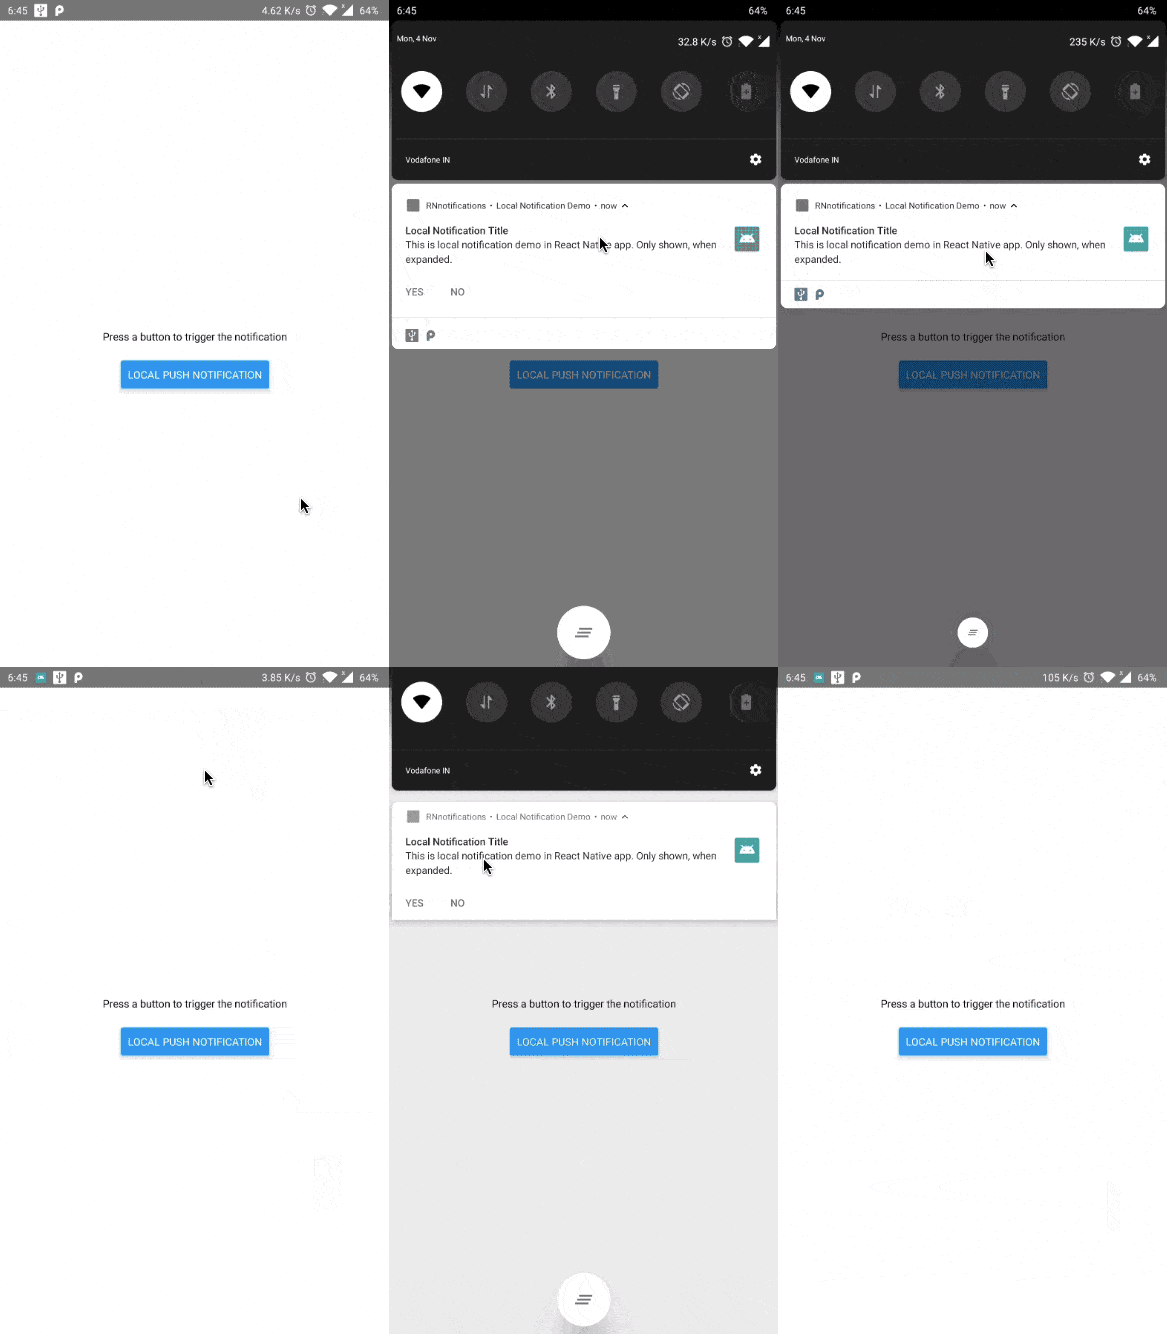
Expanding the notification displays the message from bigText. Pressing the notification results in triggering the console statement from onNotification method.

You can add scheduled notifications by using the PushNotification.localNotificationSchedule(details: Object) method or you can repeat notifications after a particular time too. Read how to do this or add more customizations in the module’s official docs.
Configure Remote Notifications
To test out how remote notifications work, let us integrate the Cloud Messaging Service using Firebase. To follow the steps below, make sure you have an active Firebase project.
From the main Dashboard page, go to Project Settings. In the Your apps section, click on Add app and set up a new Android app.
Next, it will ask you to register the application.
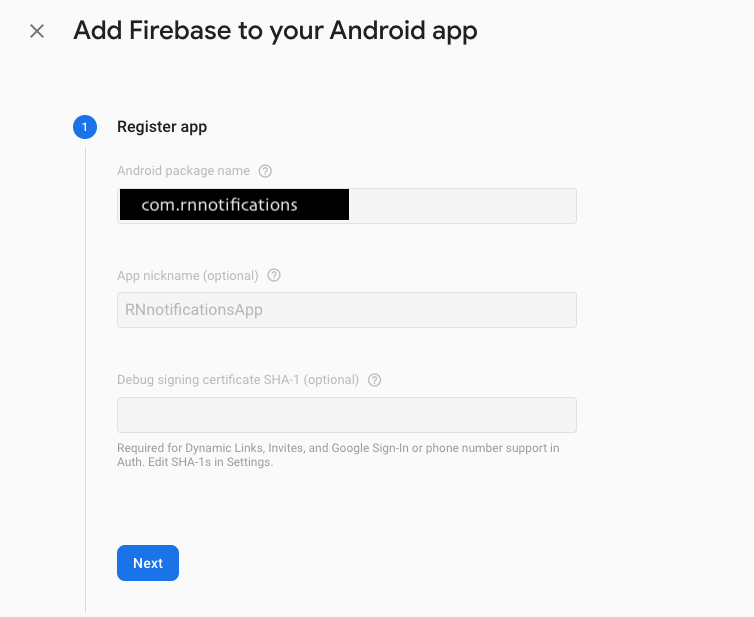
Download the file google-services.json and save it at the location android/app/ inside your React Native project.

Then, open the android/app/build.gradle file and add the following.
dependencies {
    implementation project(':react-native-push-notification')
    // ... rest remains same
}// at the end of the file, add
apply plugin: 'com.google.gms.google-services'
Next, create a new service file called RemotePushController.js inside the src/services/ directory. This file contains all the configuration to handle a remote push notification. Inside the mandatory onNotification method, let us again display the result of the remote notification in the console.
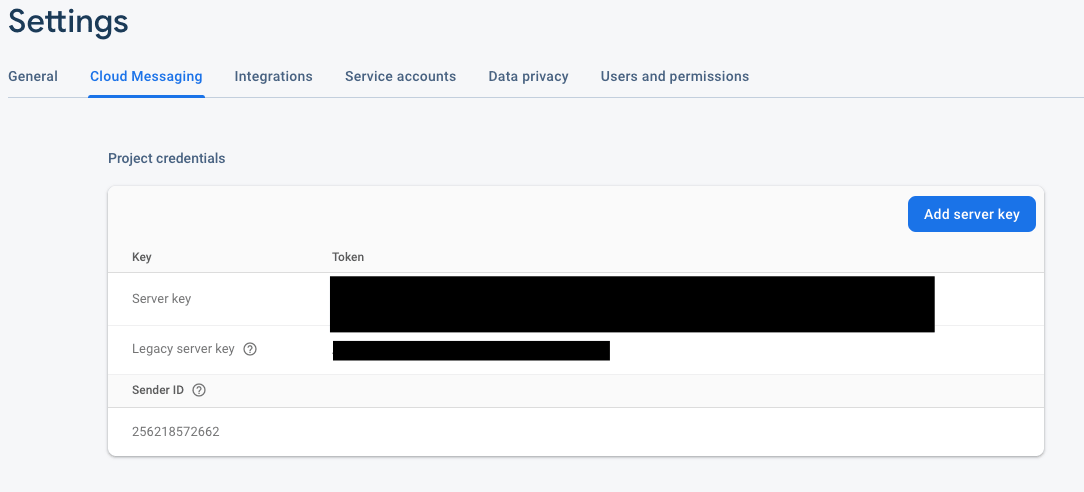
It also requires a mandatory Android property called senderID. This can be fetched form Project Settings > Cloud Messaging.
import React, { useEffect } from 'react'
import PushNotification from 'react-native-push-notification'const RemotePushController = () => {
  useEffect(() => {
    PushNotification.configure({
      // (optional) Called when Token is generated (iOS and Android)
      onRegister: function(token) {
        console.log('TOKEN:', token)
      },// (required) Called when a remote or local notification is opened or received
      onNotification: function(notification) {
        console.log('REMOTE NOTIFICATION ==>', notification)// process the notification here
      },
      // Android only: GCM or FCM Sender ID
      senderID: '256218572662',
      popInitialNotification: true,
      requestPermissions: true
    })
  }, [])return null
}export default RemotePushController
Also, the Cloud Messaging service works based on using a Token between the app and the notification service. The onRegister method registers the remote server and obtains this token. You can view this by adding a console statement.

The controller component returns null to avoid having any effects on the final layout. Add this method inside the App.js file as shown below:
// after other import statements
import RemotePushController from './src/services/RemotePushController'// before the ending <View>
  <RemotePushController />
</View>
To test it out, go to Cloud Messaging section and compose a notification.
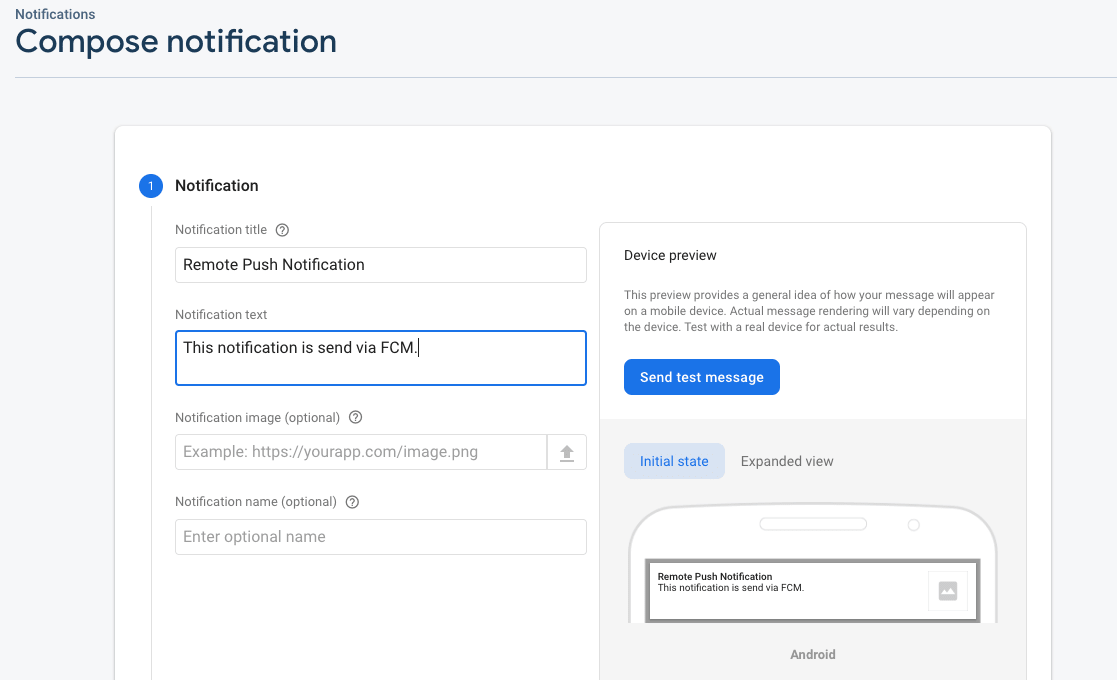
Click the button Send test message. You will have the following output.
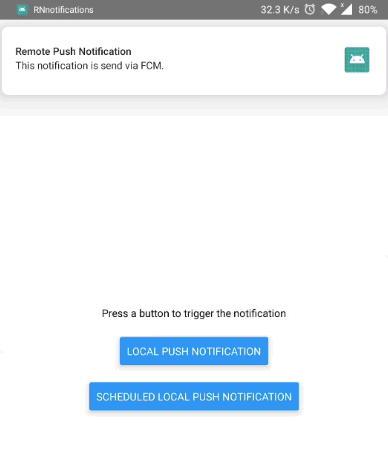
The Log in the terminal is shown for the same notification.

You can customize the title, message and another behavior of the Firebase Cloud Messaging service to send notifications at a particular time or date by composing the notification.